Rhythm is the frame that holds every melody together. If you’re serious about clean, confident playing, a metronome for piano is the simplest tool with the biggest impact. Used well, it fixes rushing, steadies tricky transitions, and teaches you to relax inside time instead of chasing it.
This guide shows how to use a metronome for piano the smart way—clear setups, step-by-step counting, proven drills, and practice plans you can actually keep. We’ll also cover the best metronome for piano options (hardware and apps), and how a light-guided smart keyboard can make early wins faster.
A metronome doesn’t make you “mechanical.” It gives you a consistent pulse so your hands learn even motion and your ear learns to trust space between notes. With regular use, you’ll notice:

There’s no single best metronome for piano. Pick the form you’ll actually use every day.
Hardware metronome (traditional or digital): always ready, no notifications, tactile feel.
Metronome apps: flexible accents/subdivisions, tap tempo, polyrhythm tools; many free. If you’re phone-first, look for the best metronome app for piano with “practice mode,” setlists, and “mute bars” features.
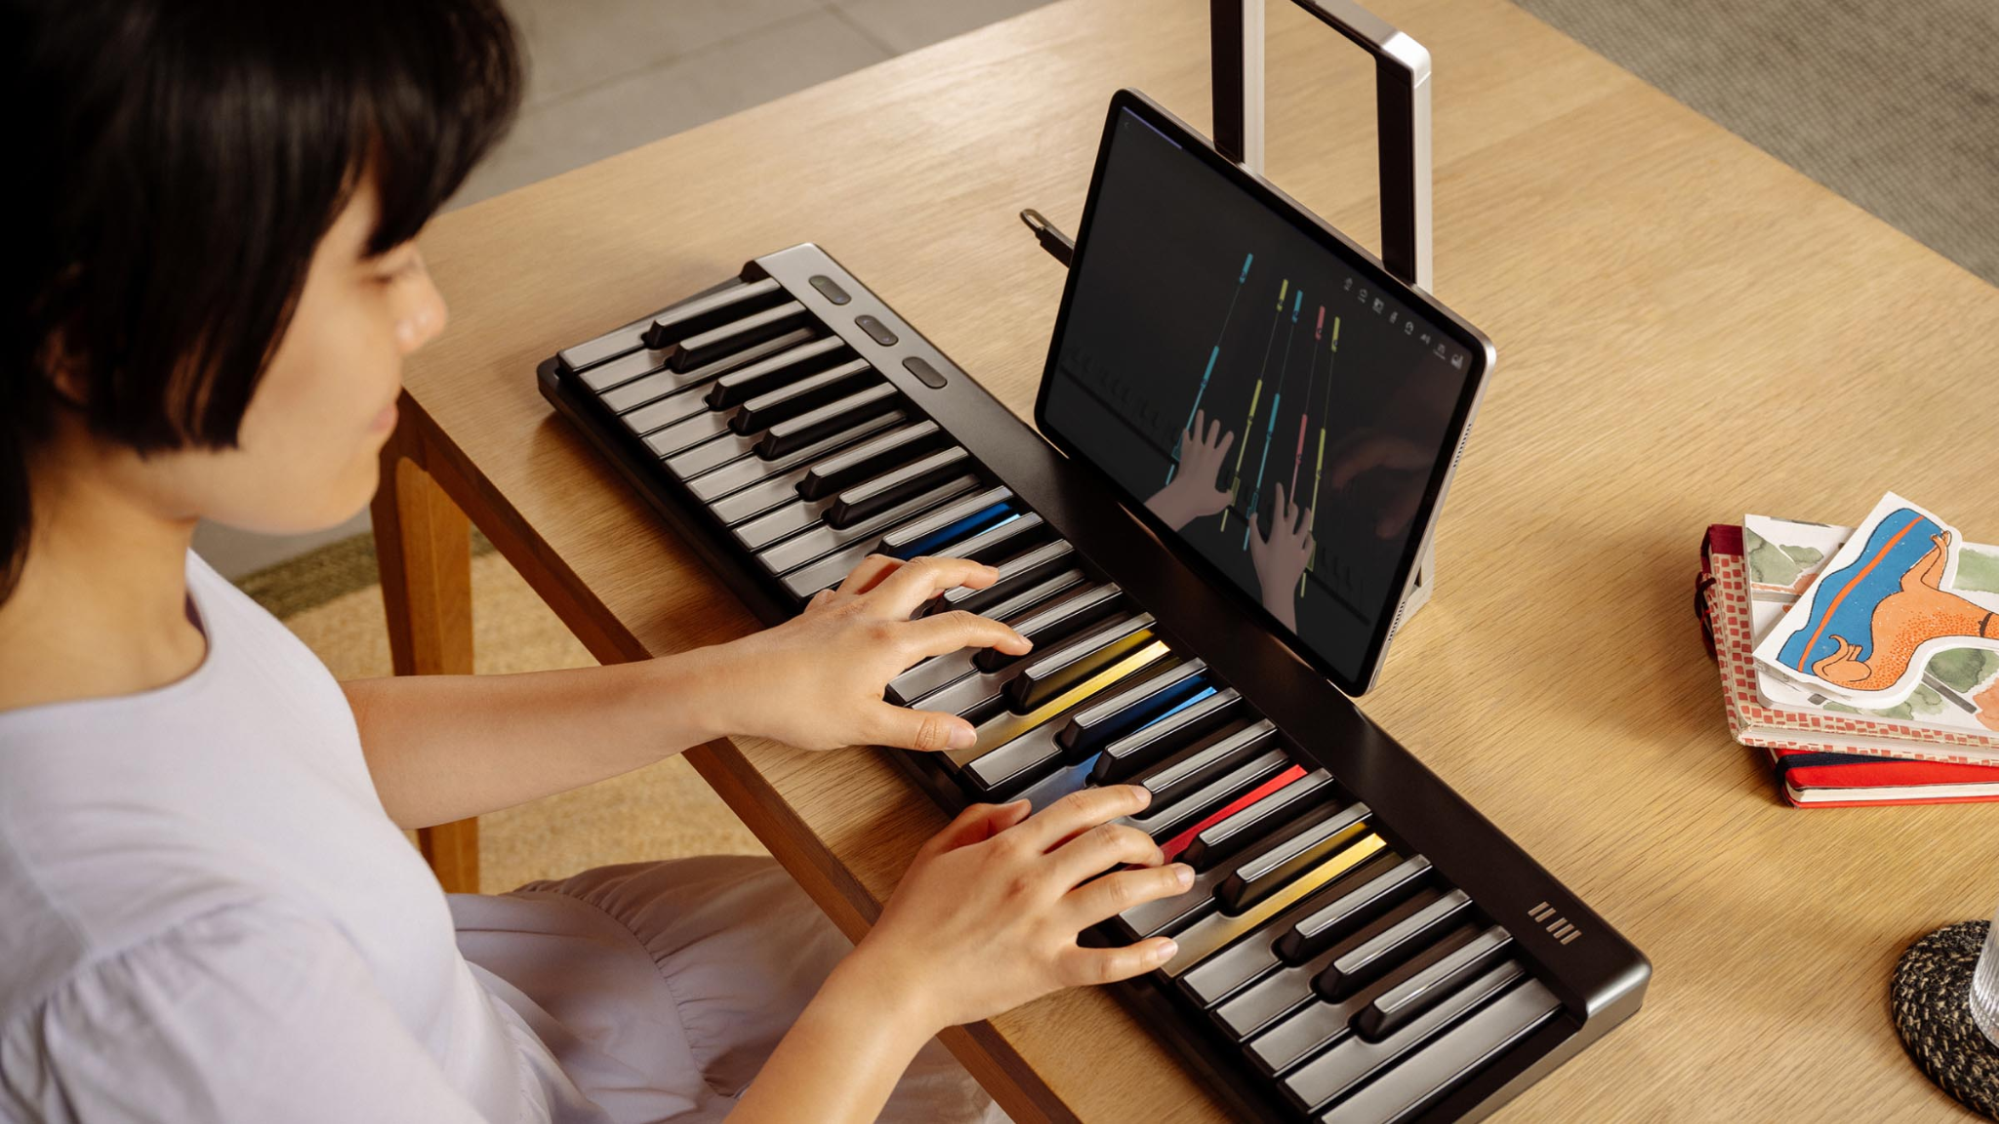
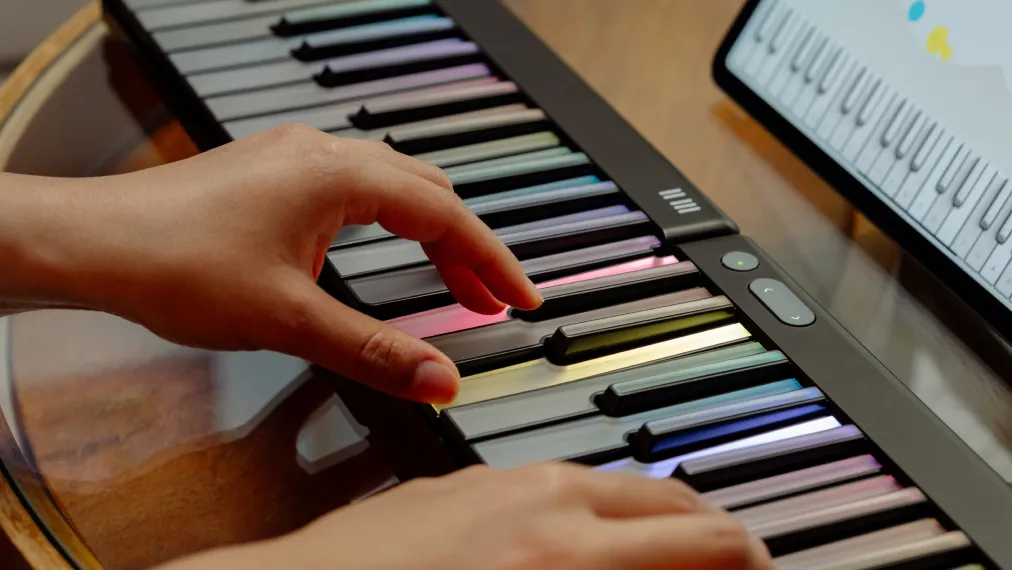
Smart keyboard built-in: one-button access, sync with lessons, and—on some models—LED pulse on the keys, which helps visual learners lock to the grid. A good option is a compact board that pairs lights + app + metronome in one place: smart keyboard with guided lights.
Most beginners drift because they stop counting when notes get hard. Keep counting—out loud at first.

These progressive drills teach you how to use a metronome for piano without getting tense. Work each one for a week.
Set the metronome to a slow tempo. Play a scale or easy melody at one note per click. Focus on identical tone for every finger. Repeat three perfect reps, then move on.
Keep the same tempo, but think/feel two notes per click (eighths): “1-and-2-and…”. Then try three per click (triplets). Subdivisions teach your hands to distribute motion between clicks.
Without changing your physical speed, change what the click represents. If you’re playing eighths at 80 bpm, let the click represent quarter notes (half-time feel), then half notes (the click only lands on beats 1 and 3). Finally, double-time subdivisions (four per click). This expands your sense of groove.
Many apps let you mute every 2nd or 4th bar. Play through the silence and see if you land back exactly with the click. Start mute-1-bar-out-of-4, then 2-out-of-4. This is the single best test of internal time.
Accent beat 2 and 4 in 4/4 (common pop feel). Then accent off-beats (“and”s). This trains groove and syncopation.
For swing, set the metronome to quarter notes and play long-short pairs (triplet feel). Avoid rushing the short note; keep it buoyant.
Identify the two bars where you usually fall apart. Loop just that hinge with the click at half speed. When you nail it, link one bar before and after, still slow, then raise tempo.

Start tiny. Pick the hardest measure and get three clean reps at a slow tempo with the click. Add one adjacent measure, still slow. Don’t attempt the full piece until links between small sections feel automatic. This is where a smart keyboard helps: some models light your next note while the metronome clicks, making slow practice intuitive and consistent.
Choose a comfort tempo (where you can play a whole phrase calmly) and a work tempo (slower, where you fix details). Alternate like this:
This keeps you from living only in “slow world” or only in “performance world.”
The metronome should reduce stress, not cause it.
20 minutes (busy day): Warm-up one scale one note per click (3 min). Loop the hardest bar at a slow tempo (10 min). Play a comfortable phrase at normal speed (5–7 min).
30 minutes (standard): Warm-up with subdivisions (5 min). Two problem bars hands separate (8 min). Hands together half speed (8 min). Mute-bar challenge (4 min). Easy play-through (5 min).
45 minutes (growth): Warm-up with accent patterns (5). New fragment HS→HT slow (12). Link phrases (12). Swing or off-beat drill (6). Record once at comfort tempo (5). Note one fix for tomorrow (5).
These are templates; swap pieces as needed. The structure matters more than the exact minutes.
Rushing the easy bits → subdivide (“1-and-2-and”), breathe on long notes.
Staring at the click → look away; the click is background, not a conductor.
Click too loud → reduce volume or use a softer sound; tension ruins time.
Practicing only from the top → isolate hinges; the metronome for piano is most valuable on short loops.
Treating the click as a test → it’s a mirror. Adjust and keep going.

A light-guided smart board can show the next key while your metronome ticks, reducing the “where do I put my fingers?” delay. Many also support USB/Bluetooth MIDI so you can drive a DAW click and practice to tracks.
If you want one device that handles lessons, LEDs, and metronome together, see this portable, modular option: smart keyboard with guided lights. Start compact; expand later if you need more range.
If you’re searching for the best metronome app for piano, look for:
When you record, use the DAW click so your parts line up with other instruments. Start with MIDI piano, then add bass or pad parts. If your smart keyboard supports MIDI out, you can let the DAW run the click while the keyboard lights show melodies—great for clean takes. Keep your audio buffer at 128–256 samples for a responsive feel.
Loop the hardest two bars at a slow tempo, three clean reps. Add one neighboring bar. Repeat tomorrow.
Use the click to learn control, then practice a pass without it to add rubato and phrasing. Alternate.
Whichever you’ll use daily. Apps win on features; hardware wins on focus. A smart keyboard’s built-in option is the lowest-friction of all.
The one you can play perfectly three times in a row. Perfection first, speed later.
The right metronome for piano habits make every other skill easier. Keep the click gentle, the goals small, and the sessions repeatable. Work in tiny loops, balance slow detail with musical play-throughs, and test yourself with mute bars or accents on off-beats.
If you want the clearest early path, pair your click with a smart keyboard that shows the next note and keeps setup to one button—portable now, expandable later
Read more
How to Use a Smart Piano Keyboard: A Clear, Beginner-Friendly Guide
A smart piano keyboard turns learning and creating into one seamless experience. In one compact instrument you can follow light-guided lessons, switch sounds for different songs, plug into a DAW to...
PopuMusic vs The ONE Smart Piano: Which Smart Piano Fits You Best?
If you’re choosing a smart piano, you’re probably weighing two paths: a smart portable piano that travels easily and grows with you, or a console-style experience that looks closer to a living-room...