If you own a light up keyboard, you know how satisfying it is to watch the keys illuminate as you play. But what happens when the lights are inconsistent or unresponsive? Calibrating your keyboard’s light sensors ensures accurate visual feedback and smooth learning. In this guide, we’ll cover everything from understanding how to make your keyboard light up to
troubleshooting issues, step-by-step calibration, and maintenance tips. Whether you’re using a PopuPiano Smart Keyboard or any other model, these instructions will help you optimize your light up keyboard performance.
Understanding your keyboard’s technology is crucial before calibration:
Tip: Keeping sensors clean and free from obstruction ensures that your keyboard lights up accurately every time.
Indicators that your light up keyboard requires calibration:
Calibration restores accurate lighting and improves your learning experience.

Before starting:
|
Issue |
Possible Cause |
Solution |
|
Some keys not lighting |
Dust or debris under keys |
Clean using soft brush |
|
Lights flicker |
Sensor misalignment |
Re-run calibration |
|
Laggy response |
Ambient light interference |
Reduce external light or reposition keyboard |
|
Entire row unresponsive |
Loose connection |
Check internal wiring or power connection |
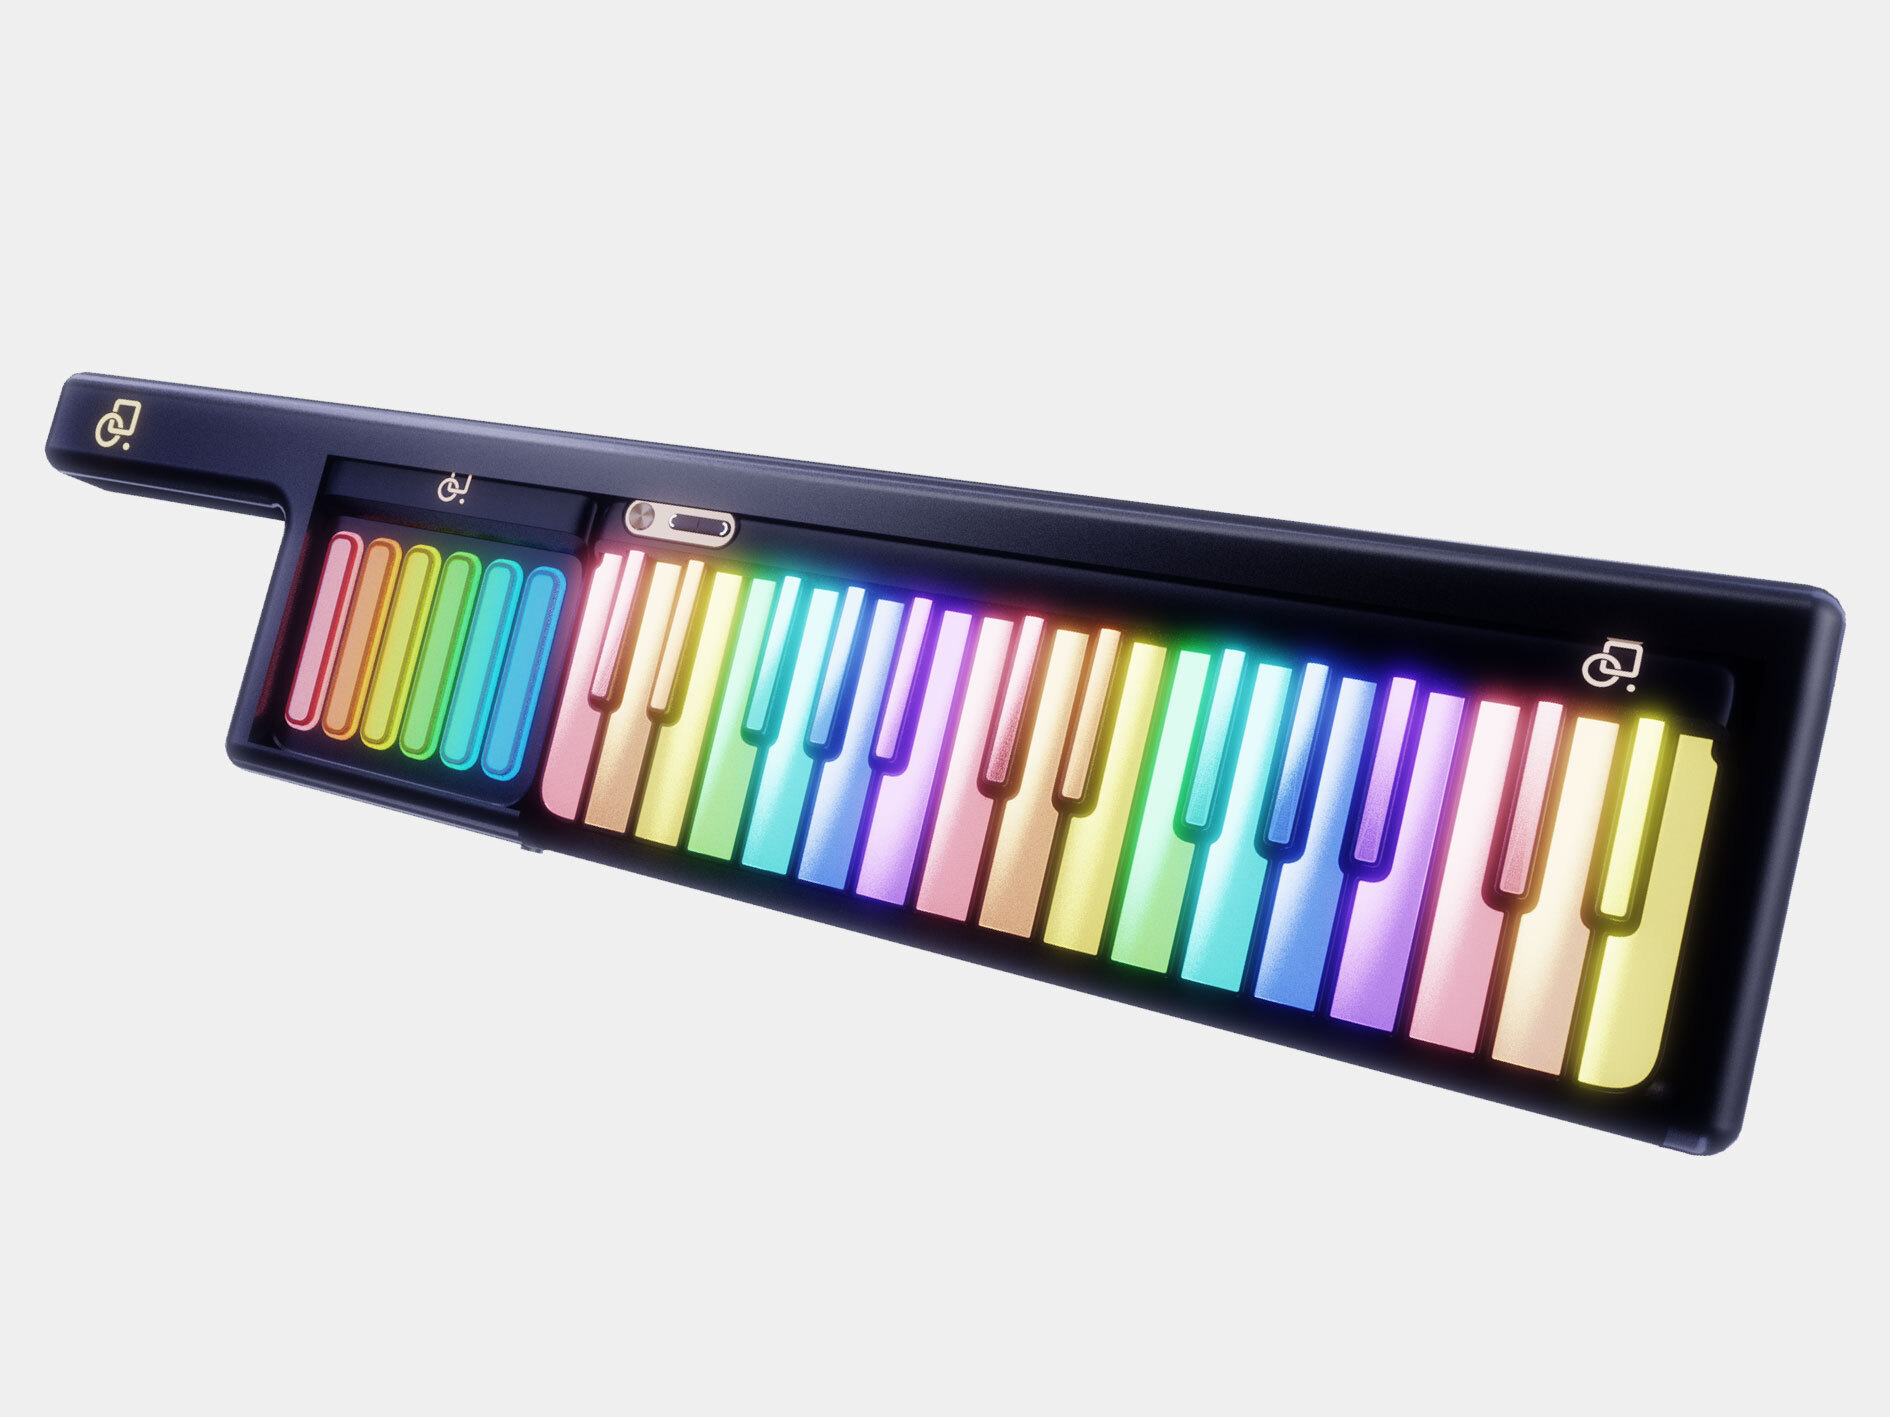
Check the Smart Keyboard for models with enhanced light sensor calibration features.

Every 3–6 months, or if you notice unresponsive or delayed lighting.
Yes. Most modern light up keyboards, including Smart Keyboard, offer user-friendly calibration modes.
Yes. Correctly calibrated LEDs ensure apps like Simply Piano accurately detect your key presses.
Yes. Excessive sunlight or dim lighting can interfere with sensor detection. Calibrate in a stable light environment.
Check for dust, loose internal connections, or try a firmware update. Persistent issues may require professional support.
Calibrating your light up keyboard ensures accurate lighting, improves learning efficiency, and keeps your instrument responsive.
By following these step-by-step instructions and maintenance tips, you’ll enjoy a smoother, more enjoyable playing experience. Explore the PopuPiano Smart Keyboard for a model designed with advanced light sensor calibration and intuitive LED guidance.
Read more
Powering Your Keyboard: USB‑C, Batteries, or Power Banks?
Playing your keyboard shouldn’t be limited by power outlets. Whether you're a home practice enthusiast or a traveling musician, understanding the best way to power your keyboard is crucial. This gu...

Set Up a Mini Practice Corner in a Small Apartment
Finding space for piano practice in a small apartment can feel challenging, but it’s entirely possible to create a piano practice setup in a small apartment that’s functional, organized, and inspir...